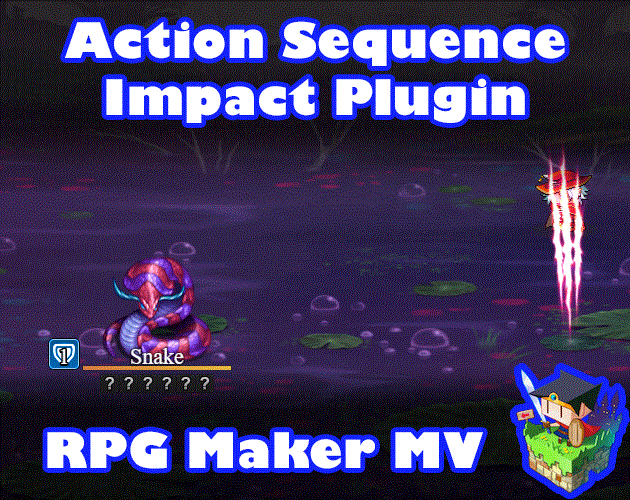
Action Sequence Impact plugin for RPG Maker MV
Introduction
This plugin adds new Action Sequences to Yanfly's Battle Engine Core (so make sure you have that plugin and the Action Sequence Packs installed) to add a couple of new effects such as balloons, move adjustments, easings, projectiles, and if you have Olivia's Battle Impact plugin, the special impact effects, too!
This plugin is made compatible with Olivia's Battle Impact plugin:
Plugin Parameters

Radian Adjustments
These are used for projectile Action Sequences. If a projectile is angled, then the "arrow head" will be the upper left corner of the icon and the lower left corner of an animation. These are the default values. If your icons or animations are made differently, you can adjust the radians to your liking. If you want to know how to convert degrees to radians, use this math formula below:
radians = degree * (Pi / 180)
This is left as a constant for all projectiles to keep the math done properly during its calculation mid-Action Sequence.
Instructions
As mentioned before in the introduction, this plugin adds new Action Sequences to Yanfly's Battle Engine Core. If you don't have those plugins, you can download them for free from here:


Some of the action sequences added in this pack also require Olivia's Battle Impact plugin to use, but those are optional. If you can get Olivia's plugin here:
After that, you could use the Acton Sequences in the sections below.
Action Sequences: Prev Target, Next Target

Before I begin on the Action Sequences, I want to say there's two new additions to the targeting mechanism. You know the parts where you put in "user" or "targets"? Now, during the <Target Actions> phase, you can use either "Prev Target" or "Next Target" to grab either the previous one or the next target in the list.
Action Sequences: New Stuff
This part of the document will now be formatted like Yanfly's Action Seq help file to bring about a sense of familiarity.

=============================================================================
BALLOON type: targets
- - - - - - - - - - - - - - - - - - - - - - - - - - - - - - - - - - - - - - -
Plays a balloon emote that you normally see on the map scene but in battle
instead. For types, replace that word with any of the following:

     !
     Exclamation

     ?
     Question

     Music
     Note
     Music Note

     Heart

     Anger
     Pissed

     Sweat
     Cobweb

     Silence
     ...

     Lightbulb
     Idea

     zzz
     Sleep

     User-Defined 1
     User-Defined 2
     User-Defined 3
     User-Defined 4
     User-Defined 5
     User1
     User2
     User3
     User4
     User5

- - - - - - - - - - - - - - - - - - - - - - - - - - - - - - - - - - - - - - -
Usage Example: balloon heart: user
               balloon !: target
=============================================================================
=============================================================================
MOVE TYPE: target, easing
- - - - - - - - - - - - - - - - - - - - - - - - - - - - - - - - - - - - - - -
Changes the way the target moves (until the end of the skill/item is done)
using easing. Replace 'easing' with any of the following:

     Linear ......... No easing, no acceleration

     InSine ......... Slight acceleration from zero to full speed
     OutSine ........ Slight deceleration at the end
     InOutSine ...... Slight accel. at beginning and slight decel. at end

     InQuad ......... LV2 Accelerating from zero velocity
     OutQuad ........ LV2 Decelerating to zero velocity
     InOutQuad ...... LV2 Acceleration until halfway, then deceleration

     InCubic ........ LV3 Accelerating from zero velocity
     OutCubic ....... LV3 Decelerating to zero velocity
     InOutCubic ..... LV3 Acceleration until halfway, then deceleration

     InQuart ........ LV4 Accelerating from zero velocity
     OutQuart ....... LV4 Decelerating to zero velocity
     InOutQuart ..... LV4 Acceleration until halfway, then deceleration

     InQuint ........ LV5 Accelerating from zero velocity
     OutQuint ....... LV5 Decelerating to zero velocity
     InOutQuint ..... LV5 Acceleration until halfway, then deceleration

     InExpo ......... Accelerate exponentially until finish
     OutExpo ........ Initial exponential acceleration slowing to stop
     InOutExpo ...... Exponential acceleration and deceleration

     InCirc ......... Increasing velocity until stop
     OutCirc ........ Start fast, decreasing velocity until stop
     InOutCirc ...... Fast increase in velocity, fast decrease in velocity

     InBack ......... Slow movement backwards then fast snap to finish
     OutBack ........ Fast snap to backwards point then slow to finish
     InOutBack ...... Back In, then Back Out

     InElastic ...... Bounces slowly then quickly to finish
     OutElastic ..... Fast acceleration, bounces to zero
     InOutElastic ... Slow start and end, two bounces sandwich a fast motion

     InBounce ....... Bounce increasing in velocity until completion
     OutBounce ...... Bounce to completion
     InOutBounce .... Bounce in and bounce out
- - - - - - - - - - - - - - - - - - - - - - - - - - - - - - - - - - - - - - -
Usage Example: move type: user, InOutBack
               move type: target, OutBounce
=============================================================================
=============================================================================
MOVE target OFFSET: +X, +Y
- - - - - - - - - - - - - - - - - - - - - - - - - - - - - - - - - - - - - - -
Use this after a Move Action Sequence. This lets you adjust the movement
location goal of the target by +x and +y. You can use negative numbers, too.
A positive number will mean further past the goal. A negative number means
before the goal. This is done this way to not have absolutes making tricky
calculations depending on which way the battler is facing
- - - - - - - - - - - - - - - - - - - - - - - - - - - - - - - - - - - - - - -
Usage Example: move user offset: +100, +0
               move target offset: -50, +25
=============================================================================
=============================================================================
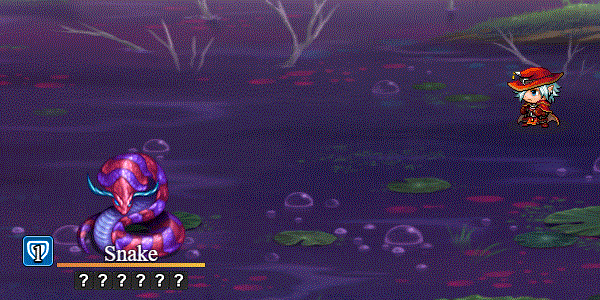
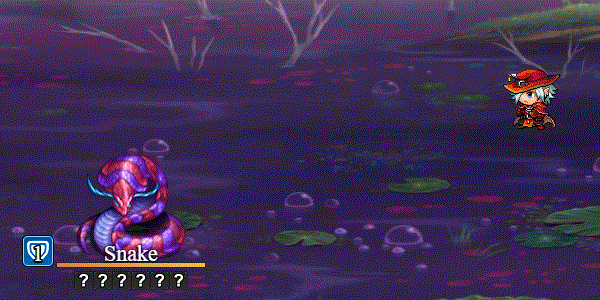
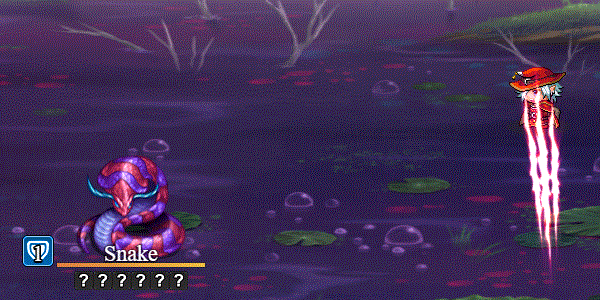
PROJECTILE ICON id: START x y, GOAL x y
PROJECTILE ICON id: START target, GOAL target
PROJECTILE ANI id: START x y, GOAL x y
PROJECTILE ANI id: START target, GOAL target
PROJECTILE ANIMATION id: START x y, GOAL x y
PROJECTILE ANIMATION id: START target, GOAL target
(optional parameters)
DURATION d
ARC a
EASE type
SPIN s
ICON SCALE i
ANGLE
START OFFSET +x +y
START OFFSET -x -y
GOAL OFFSET +x +y
GOAL OFFSET -x -y
- - - - - - - - - - - - - - - - - - - - - - - - - - - - - - - - - - - - - - -
Replace id with either the icon index or the battle animation graphic you
want to use with the projectile. Choose a starting X and Y position or link
it to a target. Then choose a goal X and Y position or link that to a target
too. The rest of the parameters are optional and can be used in any order
you want, but I'll go through each of them.
If the starting targets have more than one member in them, projectiles will
be spawned from each target as a source. If the goal targets have more than
one member, projectiles will be made for each target. This means for each
source and each goal, a projectile will be made.
Duration: replace the d with the number of frames of duration. Default: 20
Arc: replace the a with the maximum arc height in pixels
Ease: replace type with an easing type from the Move Type list above
Spin: replace s with how fast you want the projectile to spin.
Icon Scale: replce i with the scale you want to increase your icons by
Angle: If you want the projectile to "arrow head" towards its goal, use this
Start Offset: lets you adjust the x and y offset of the starting position
Goal Offset: lets you adjust the x and y offset of the goal position
You can use as many projectiles on the screen at once as you want.
- - - - - - - - - - - - - - - - - - - - - - - - - - - - - - - - - - - - - - -
Usage Example: projectile icon 161: start user, goal target
projectile ani 71: start user, goal target
projectile icon 176: duration 60, arc 300, spin 1.5
projectile ani 71: duration 60, arc 50, ease InOutBack, angle
=============================================================================

=============================================================================
WAIT FOR PROJECTILE
- - - - - - - - - - - - - - - - - - - - - - - - - - - - - - - - - - - - - - -
Waits for all the projectiles on the screen to reach their targets before
moving on with the rest of the Action Sequence list.
- - - - - - - - - - - - - - - - - - - - - - - - - - - - - - - - - - - - - - -
Usage Example: wait for projectile
=============================================================================

=============================================================================
AFTERGLOW target

(optional parameters)
SCALE s
BRIGHTNESS b
DURATION d
- - - - - - - - - - - - - - - - - - - - - - - - - - - - - - - - - - - - - - -
(requires Olivia's Battle Impact plugin)
Makes an afterglow effect on the target.

Scale: replace s with the scale of the glow.
Brightness: replace b with how bright the effect is.
Duration: replace d with the duration of the effect in frames.
- - - - - - - - - - - - - - - - - - - - - - - - - - - - - - - - - - - - - - -
Usage Example: afterglow user
               afterglow target: scale 1.5
               afterglow target: brightness 2
               afterglow user: duration 20
               afterglow user: scale 2, brightness 4, duration 60
=============================================================================
=============================================================================
APPLY ICON id: target
REMOVE ICON id: target
- - - - - - - - - - - - - - - - - - - - - - - - - - - - - - - - - - - - - - -
(requires Olivia's Battle Impact plugin)
Apply/Remove icon effect for the target. Replace id with an icon index.
- - - - - - - - - - - - - - - - - - - - - - - - - - - - - - - - - - - - - - -
Usage Example: Apply Icon 2: target
               Remove Icon 1: user
=============================================================================
=============================================================================
COLOR BREAK

(optional parameters)
INTENSITY i
DURATION d
- - - - - - - - - - - - - - - - - - - - - - - - - - - - - - - - - - - - - - -
(requires Olivia's Battle Impact plugin)
Makes the colors on the screen break up before coming back together.

Intensity: Replace i with the intensity level of the break effect.
Duration: Replace d with the duration of the effect in frames.
- - - - - - - - - - - - - - - - - - - - - - - - - - - - - - - - - - - - - - -
Usage Example: color break
               color break: intensity 30
               color break: duration 20
               color break: intensity 60, duration 10
=============================================================================
=============================================================================
MOTION BLUR target

(optional parameters)
VELOCITY x y
OFFSET o
DURATION d
- - - - - - - - - - - - - - - - - - - - - - - - - - - - - - - - - - - - - - -
(requires Olivia's Battle Impact plugin)
Makes a motion blur effect on the target before dissolving.

Velocity: Replace x and y with the horizontal and vertical velocity power.
Offset: Replace o to determine how much to offset this effect by.
Duration: Replace d with the duration of the effect in frames.
- - - - - - - - - - - - - - - - - - - - - - - - - - - - - - - - - - - - - - -
Usage Example: motion blur user
               motion blur target: velocity 30 60
               motion blur target: offset 10
               motion blur target: duration 20
               motion blur user: velocity 40 40, offset 100, duration 60
=============================================================================
=============================================================================
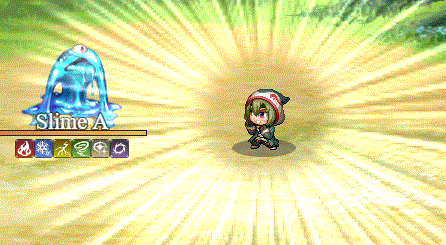
SHOCKWAVE: CENTER x y
SHOCKWAVE: CENTER target
(optional parameters)
AMPLITUDE a
WAVELENGTH w
SPEED s
- - - - - - - - - - - - - - - - - - - - - - - - - - - - - - - - - - - - - - -
(requires Olivia's Battle Impact plugin)
Makes a shockwave at either X, Y coordinates or at a target's center.
Amplitude: Replace a with how powerful you want the amplitude to be.
Wavelength: Replace w with how big the wavelengths are.
Speed: Replace s with how fast it is. Use a number between 0 and 1.
- - - - - - - - - - - - - - - - - - - - - - - - - - - - - - - - - - - - - - -
Usage Example: shockwave: center 300 400
shockwave: center target
shockwave: center target, amplitude 30
shockwave: center target, wavelength 160
shockwave: center user, speed 0.2
shockwave: center user, amplitude 20, wavelength 120, speed 0.1
=============================================================================
RPG Maker Version
This plugin is made for and tested on RPG Maker MV with version 1.6.2. I cannot guarantee if it works on lower versions.
Terms of Use
1. These plugins may be used in free or commercial games.
2. 'RPG Maker Irina' must be given credit in your games.
3. You are allowed to edit the code.
4. Do NOT change the filename, parameters, and information of the plugin.
5. You are NOT allowed to redistribute these Plugins.
6. You may NOT take code for your own released Plugins.
Changelog
- 2019.04.09 - Added better compatibility with Action Sequence Fast Forward/Skip.
- 2019.04.05 - Added compatibility with Yanfly's Battle Animation Speed Option plugin
- 2019.03.14 - Hotfix, Projectile Offsets now don't disappear completely
- 2019.03.13 - Major Update #1
- 2019.03.12 - Hotfix, fail safe added for those using animation projectiles and don't have frames present
Purchase
In order to download this tool you must purchase it at or above the minimum price of $8.99 USD. You will get access to the following files:
Development log
- Action Sequence: DrainApr 02, 2019
- Major Update #1Mar 13, 2019
- Action Sequence: Color BreakMar 13, 2019
- Action Sequence: Shuriken BounceMar 13, 2019
- Action Sequence: Magic MissilesMar 12, 2019